Restore a Moodle course
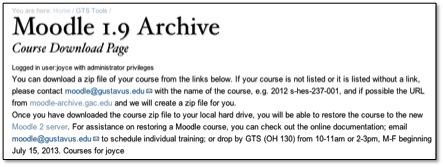
1. Go to the Moodle 1.9 Archive Course Download Page. If you are not already logged into your Gustavus account, you will be asked to provide your username and password.
2. Once authenticated, you will be presented with a list of links that correspond to the academic courses you have been enrolled in for the last three years. You may also see non-academic “courses” that you are currently enrolled in, such as committees or department resources. You do not need to restore non-academic courses, as GTS has already done that for you.
Locate the .zip file of the course that you wish to restore, e.g. 2012 f-hes-237-001, and click on the link to download the .zip file. (Depending upon which browser you use and how your browser is configured to handle .zip files, you may need to change your preferences so that the .zip file is downloaded to your local hard drive.)
3. Once the .zip file is downloaded, go to the new Moodle server. Open the course that you want to restore the data to.
4. Under the Administration block on the left, click on the “Restore” link.
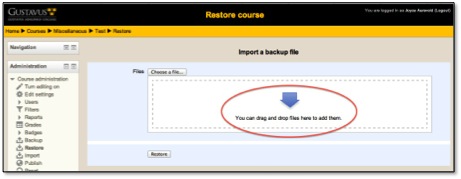
5. In the Restore course window, there are two ways to import the .zip file. One is to “drag and drop” the file from its location on your local hard drive into the “drag and drop” section of the window.
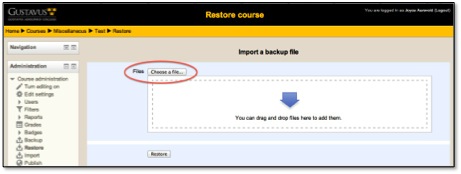
The second method is the click on the “Choose a file…” button, which will bring you to the File Picker window. Click on the “Upload a File” button and then navigate to the location of the .zip file on your local hard drive and select it.
Once you have uploaded your .zip file click on the “Restore” button to proceed. Moodle will now walk you through the 7 steps of a course restoration.
6. Step 1: Confirm will display the following “warning” message. This is normal and you do not need to be concerned about it. Click on the “Continue” button to proceed.
7. Step 2: Destination will give you the option to either merge the backup course into the new course, or delete the contents of the new course and then restore. Choose which ever option is appropriate for your situation. If you are doing a restore to a new course, you would typically choose to merge the backup course. Click Continue.
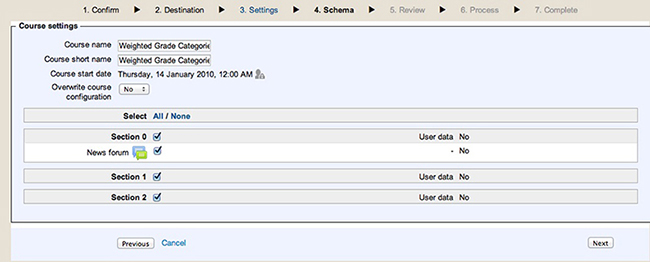
8. Step 3: Settings will just confirm the default settings. Typically, you will not change any of the options here. Click Next to continue.
9. Step 4: Schema displays a list of all the content in the course backup. Checked items in the list are restored to the new course, and then click on the Next button to proceed.
10. Step 5: Review will provide you with an overview of the Backup Settings and the Course Settings. If you need to make changes, click the Previous button on the bottom of the page. If the restore looks good, click the Perform Restore button.
11. Step 6: Process and Step 7: Complete Once the Restore process is complete (this could take a few minutes, depending upon the size of your course), you will get a confirmation that the Restore was successfully completed. Clicking on the Continue button will take you to your new course with the contents restored.


